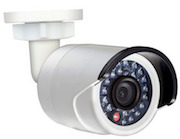
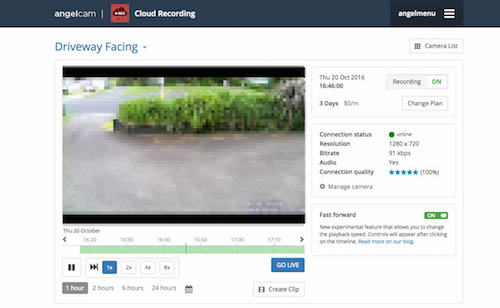
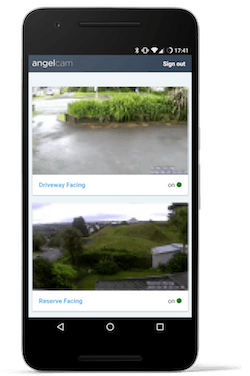
My parents just got two IP cameras. These are cameras that connect to your home network to allow access over a computer network.

I had some requirements to make the IP cameras useful:
-
Remote Access. Obviously, an IP camera that can only be accessed from the local network isn’t very useful if you want to check up on the home! The cameras should be accessable from anywhere in the world via an internet connected device.
-
Security. The internet is full of stories of the dangers of unsecure IP cameras, such as the website allowing public access to thousands of them. I want all access to the cameras to be encrypted and require authentication.

-
Compatibility. The IP camera’s built-in web interface requires a browser plugin. I couldn’t even get this going on my computer, let alone a mobile device. Accessing the cameras should be possible from any web browser and mobile devices.
-
Recording. The footage from the cameras should be recorded. Obviously, these cameras aren’t being watched 24/7 so their footage should be able to be retreived at a later point if a need arises.

-
Simplicity. Last, but not least, access to the cameras should be simple. My way of judging this is that I should be able to get into the cameras on any computer without needing a bookmark or note.
Finding a solution
I discovered that the cameras we have run a Real Time Streaming Protocol (RTSP) server so the awful web interface is optional. Interestingly, despite the web interface being password protected, the RTSP stream is wide open!
My first thought was to build a web interface of my own that provides security and HTML5 support by transcoding the camera stream. This could have been a fair bit of work and doesn’t address the recording requirement.
However, I then discovered AngelCam. This service connects to your IP cameras and lets you access them from a browser or their iOS/Android app. In addition to meeting my requirement of recording, this also means all the recordings are safe off-site, making it difficult to wipe the footage.

There are also plenty of other optional features like public broadcasts, timelapses, and a few more features in the works, like licence plate recognition or alerts when a line is crossed.
Setting up AngelCam
There are a few options to connect cameras to AngelCam.
- AngelCam ready camera. Some cameras have built in support for AngelCam, not mine. Next!
- Providing the camera URL. You can directly provide the URL of the camera to AngelCam. Most likely this won’t be encrypted and may rely on portforwarding and a dynamic DNS service.
- AngelBox. AngelCam sells AngelBox, a Raspberry Pi loaded with AngelCam’s software. This sets up a secure connection between your cameras and AngelCam’s servers, meaning they don’t need to be publicly accessable.
- Arrow client. The Arrow client allows you to use your own computer like an AngelBox through the open source code.
As we’ve got a home server, I wanted to use this as the Arrow client. I made a Docker image to run the Arrow client easily and on any operating system. As of 2023, I no longer maintain this Docker image - but you can see the public archive of the source code on GitHub.
Evaluation
AngelCam meets all my requirements as it provides secure remote access and works on any device. It is simple to access, only requiring visiting the AngelCam website and remembering the username and password, and it provides recording.
AngelCam has worked well over the last few months, and I’m looking forward to seeing their feature set expand over time.

Please note: I have no affiliation with AngelCam, and I receive no benefit from this post, it’s just simply the solution I discovered.
Edit, 27 Dec 2016: Edited to reflect the fact that AngelCam has now removed their free plan. It’s likely still good value for the convenience, but as we have a home server I’m now considering self-hosted alternatives.
Edit, 30 Aug 2023: Edited to remove the link to the arrow-client Docker image which I no longer maintain.